Introduction
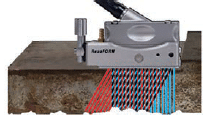
Phased array (PAUT), an advanced method of ultrasonic testing (UT), is widely used for non-destructive testing (NDT) in several industrial sectors, such as construction, pipelines, and power generation. This method is an advanced NDT method that is used to detect discontinuities i.e. cracks or flaws and thereby determine component quality.
A Brief History of PAUT
Phased array (PAUT), made its first appearance in the medical industry in the 1950s for pregnancy scans. A few years later industry realised the full potential of PAUT testing, and began using it to inspect the integrity of manufactured or in-service components and weldments.
Advantages of using PA are as follows:
PA enables inspections to be completed significantly faster than traditional UT, while at the same time collecting and storing substantially more information.
Other advantages include:
- Increased control of the beam characteristics i.e. the beam can be focused and steered.
- Simultaneous inspection with many angles using just one PA probe
- Electronic scanning (rastering) possible without moving the probe
- Complex geometries can be comprehensively inspected
- Limited access areas can be interrogated
- Can replace costly and hazardous Radiography
- Provides us the ability to digitally record inspection data
Example of PAUT’s advantages
In scanning a butt-weld using traditional UT, several different probes – 0°, 45°, 60° and sometimes 70° angles – have to be used to cover the entire weld volume. One probe will scan the bottom of the weld, another the fusion zone and a third for the weld body and weld toes.
In addition, each probe has to be moved backwards and forwards perpendicular to the weld covering both the half skip and full skip areas – a process known as rastering. This action ensures that the sound beam is directed towards every possible flaw location, at as close to 90 degrees as possible.
With PAUT, a single probe can cover all of these angles and many more from a fixed probe position. The ‘rastering’ is now conducted electronically with no back and forth probe movement. Now an entire weld can be inspected by scanning (lateral movement) of the probe along the length of the joint, parallel to the weld at a fixed distance from the weld centre.
State of the Art Equipment in S.A.
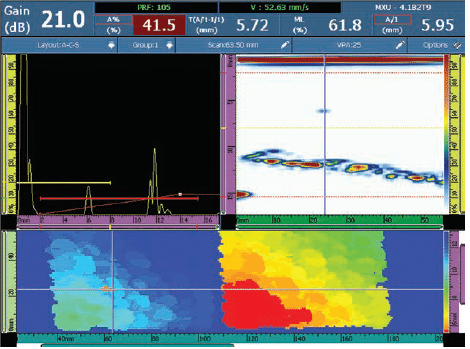
PAUT equipment in common use in SA is fully digital and incorporates many viewing features ( sectorial scan, cross sectional scan “B”, Plan view scan “C”, amplitude vs distance or time “A” scan,) making the inspection tasks easier. Further, the plate thickness in the case of welded configurations, for example, can be entered into the PAUT unit and one can adjust the probe position on the unit showing the technician the optimum scanning position alongside the weld prior to conducting the test. Simply put, it will show you exactly where to place the probe on the test component. The same can also be applicable to different geometry configurations.
 |
 |
 |
|
Being digital, PAUT machines can store large amounts of inspection data and their reporting software enables inspection reports to be generated immediately after an inspection is completed. Where required, images of the inspected component can also be embedded into the reports. “The data collected can also be copied onto memory cards for uploading onto computer systems, emailing to clients or archiving for long term traceability.
Differences between PAUT and Traditional UT
One of the main differences between PA and traditional UT is that a traditional UT angle probe only consists of one crystal, which generates an ultrasonic compression wave, and a probe casing, which holds the crystal at the designed steering angle. The different angles are created by mode conversion of the compression waves into shear waves for a more sensitive inspection. Also, different probes are needed for each different angle – typically three or four probes (0, 45, 60, and 70) have to be systematically used to ensure that the full weld volume is inspected.
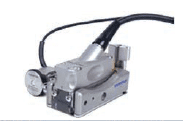
PA technology replaces the one crystal with an array of crystal elements in a single casing. Probes can have 16, 32, 64,128 or even 256 individual ultrasound generating elements. Some probes, for example, have 64 elements and combinations of these can be made to fire at various angles, which means that, collectively, one PA probe could, theoretically scan an entire weld from a single position.
PAUT is being used more and more, sometimes to replace traditional UT inspections but, increasingly, as an alternative to radiographic inspection (RT). Inside a boiler, for example, boiler tubes were historically X-rayed.
Due to safety concerns, it meant all the welders, grinders and workers anywhere in the vicinity of the X-ray inspection area would have to stop work, down tools and move away to a safe area. Using PAUT, an inspector, welder or supervisor can work side by side. As soon as the weld cools down sufficiently to be inspected, a PA inspection can be completed. The results can be viewed online by the welder, who can see exactly what is going wrong and, if permitted, the problem can be fixed immediately and the weld or welds can be retested.
In terms of the probability of detection, PAUT offers better reliability and sensitivity compared to Radiographic Testing and conventional UT. Often PAUT operators find flaws, such as fine cracks and small areas of lack of fusion, that have been invisible in the past. PAUT testing has been found to be excellent in exposing such imperfections.
Additional applications of PAUT include:
- the inspection of Non-metallic materials and composites e.g. Aircraft parts, bonded materials and composites, disbonds and porosity
- the inspection of Metallic materials e.g. bar, rod, rail, plate, castings and forgings
- discontinuity detection and material integrity evaluations
- complex geometries e.g. turbines, dovetails, rotors, keyways, nozzles, flanges and counter bore can equally be examined using PAUT
FOR MORE INFORMATION CONTACT MARK DIGBY AT SAIW ON 011 298 2100
